As I mentioned in my primary post for San from Princess Mononoke, this was by far the most craft-intensive, DIY-heavy costume I’ve undertaken thus far, and it was SO FUN. I didn’t do anything that was super complicated, I stuck to relatively simple methods and materials, nothing fancy, nothing that was a new technique. No Worbla, no dying unfamiliar fabrics, no buying fancy new tools. Tried and true crafting, like when we were kids: papier mache, craft foam & glue, stringing beads, acrylic paint, safety pins, needle & thread, those kinds of things. There were several things I needed to make, so I was conservative with the techniques in the interest of time and sanity. There would be time later to learn new things, but for my first DIY costume, I felt I needed to start simple. And it WORKED. Here’s a breakdown of all the DIY pieces and how I made them. 
First, the necklaces! San wears two, the “tooth” necklace and the blue crystal one that Ashitaka gives her. Here’s a screen cap of what they look like in the movie.
Tooth & Bead Necklace
Supplies:
- Wild Boar Teeth
- Faux Lava Stone Beads
- Twine
- Necklace Kit w/Lobster Clasp


 This was the first accessory I made for this costume, and it was pretty straightforward. I was going for a realistic look instead of a cartoon-y appearance, so I opted for beads that looked like lava rocks and boar’s teeth. The teeth were $16.90 on Etsy, and the lava rock beads and twine/clasp necklace kit came from Michaels for about $10 together. (NOTE: since then, I’ve learned a lot more about the buying and selling of animal teeth and other items, and I would NOT have purchased these without doing a really thorough check on how they were sourced, and probably not even then, as a lot of the buying and selling of animal items is done in ways that causes suffering to animals or kills them prematurely, which I wasn’t fully, consciously aware of at the time of this costume.)
This was easy to put together once I had the pieces. The clasp kit comes with instructions, and you only need some small pliers (needlenose worked best for me), to squeeze the ends together to hold the twine inside the metal pieces once they’re tied. Other than that, it was just stringing beads! Easy peasy.
Crystal Dagger Necklace
Supplies:
- Blue Glass Arrowhead Necklace
- Leather Cording
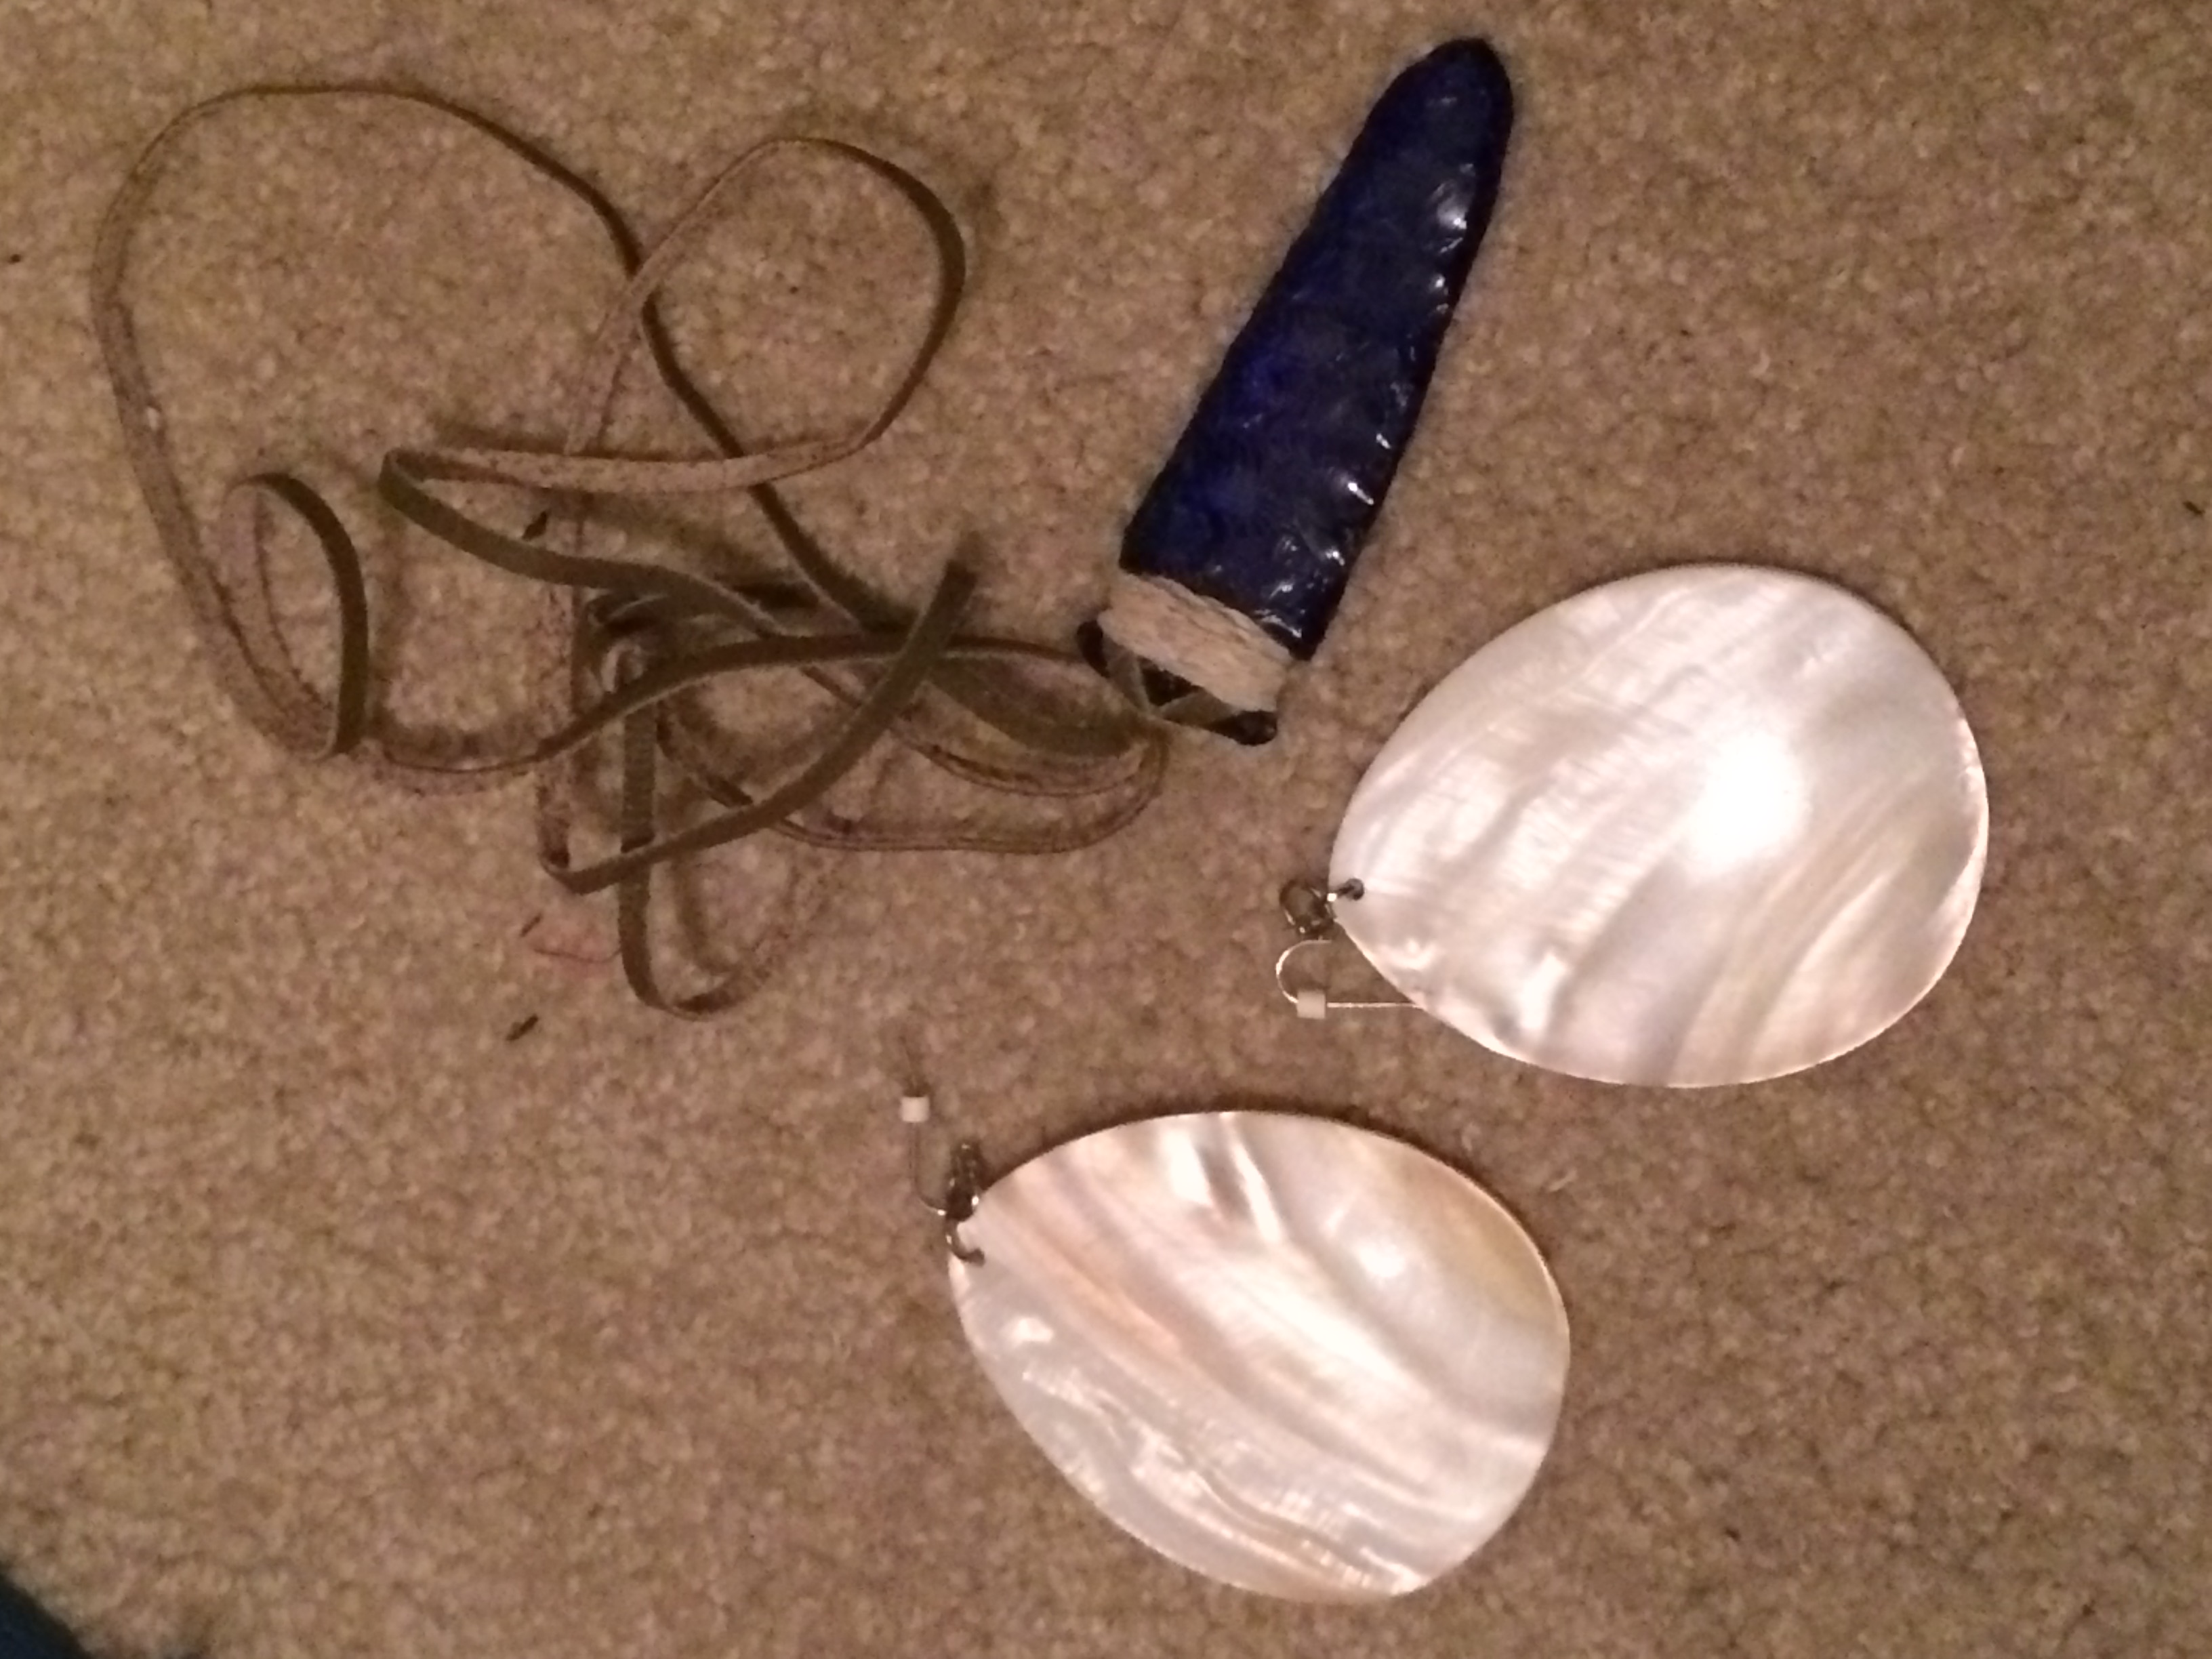
I also wanted to wear the crystal dagger necklace that Ashitaka gives to San. I figured Etsy would have something I could use, and I was right! I found this awesome blue glass arrowhead necklace to use as a base and added my own twine cording to the top of it, spending around $15.50 for it altogether.
Headband & Armbands
Supplies:
- Finishing Strips
- Large Natural Button
- Small Natural Buttons
- Thread
More easy stuff! For San’s headband and armbands, I used some really simple pieces. I found some quilt binding that I felt was a good width to make the bands out of, and simple used some Tacky Glue to close it so it wasn’t a folded piece of fabric but instead a close band, cut it to the right length, and used some sticky-back velcro as the “clasp”. I then sewed these pretty natural-looking buttons to the middle of each piece for the circlular details you see (taking some artistic liberties with the style, of course, but again going for a more realistic, less cartoonish look). The buttons were about $2 each, and the binding was only a few dollars as well. So all three cost me around $10 max. 

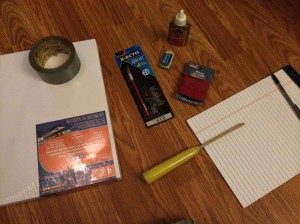
Dagger & Spear 

Supplies:
- Foam Board
- Duct Tape
- Acrylic Paint (White, Red, Black)
- Gorilla Glue
- Wooden Dowels (or substitutes)
- Red Suede Cording
- Xacto Knife (or other craft knife)
 San carries both a dagger and a spear, of very similar design. So I made the blades basically the same and just changed up the handles. I used these instructions as a basis. For the dagger handle I actually used an old outdoor citronella candle on a stick that I had laying around that felt the perfect size. A nonconventional option, to be sure, but it worked! For the spear I used an old broom handle, detached from the bristles. First I traced out the size of the blade on paper, then transferred it to foam board and cut out several pieces of the same size, with the center piece of the dagger including a notch cutout for the candle piece to be inserted. I then glued them together with Gorilla glue (with the candle inside), weighted them down and let them dry, then I carved the edges into a blade shape with an Xacto knife.


After I was happy with the shape, which I intentionally made ragged on the edges to look more like chipped bone or stone, I covered the whole thing in duct tape to give it more texture and a uniform surface for painting. I used acrylic craft paint on the whole thing, made some templates for the red details, which I traced on with pencil before painting, and then wrapped the base of the handles with some faux suede cording and glued it in place. Ta da! I only needed to purchase the foam board, cording, and a new Xacto knife, so total these cost me less than $15.00 from Michaels.


The Mask!
Supplies: 
- Newspapers
- Elmer’s Glue
- White Paper
- Air Dry Clay or Scupley
- Acrylic Paint (Red, White, Yellow, Black)
- Xacto Knife (or other craft knife)
- Mesh fabric
- Children’s Bouncy Ball (or other suitable base)
- E-6000 Glue
The mask was clearly the hardest to put together, since I needed to fab it myself from scratch. I used some other people’s posts for inspiration, including these:
- Princess Mononoke “San” Mask by meanlilkitty on Instructables
- Meagan Marie’s Cosplay Feature
- TheSheikSheikahShop’s San Mask on Etsy
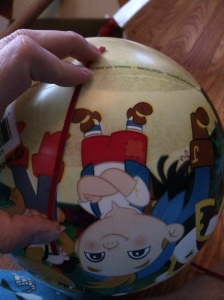
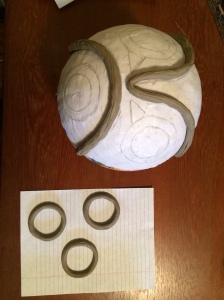
Step one was making the base for the mask, which I decided to make from papier mache. I found a small kids’ bouncy ball at a dollar store that was a good size and curvature to use as a base. I used a string from a middle point to trace a uniform circle around the ball so my mask would be a nice round shape. I then did a traditional newspaper-based papier mache with glue and water. I did 3 layers of newspaper and then a layer of paper towel, and a layer of white paper on top (for easier painting).


Once the papier mache felt thick and sturdy enough, I detached it from the ball and traced the mask design on the paper. I used the design to make the clay accent pieces that stick up from the mask, around the eyes and mouth and forehead.


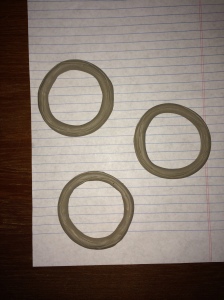
I made these pieces out of air-dry clay, which I allowed to dry ON the mask to keep the right curvature. They didn’t come out perfectly, and if I had to do it again I might use Sculpey or salt dough instead, as it’s less brittle, but so far it’s held together well enough, though it does have a few cracks in it (they lend some realism!).


Once the clay was dry, I glued it to the mask using the trusty E6000 glue (since it dries clear), and used an Xacto knife to cut out the “eye holes”, which I decided would be the small triangles next to the “eyes”, which I spaced so that I would be able to see through them. Then painting began! I used normal acrylic craft glue in white, black, red and yellow, nice and bright. Then I used a scrap piece of mesh fabric I had laying around, which I painted black so it would blend better into the mask and be less noticeable as a “hole” in the mask. I glued these to the inside of the mask, and while they’re not perfect, I can see through the mask when it’s on, which is awesome.


The final steps were attaching the faux fur to the edges of the mask, along with the “ears”, which I cut out of red drink coozie I found at Michael’s! Haha. I glued the fur on and stapled the coozies to the fur. Super simple, that part. This mask was GREAT fun to make, and actually pretty cheap, aside from the faux fur. I think I spent less than $10 on the mask supplies including the Elmer’s Glue, red drink coozie, and the red paint (the only color I didn’t have the right shade of already).
More Resources
Some other DIYs out there, including alternative methods and materials:
- RoxyRocksTV DIY Mononoke Accessories Cosplay Tutorial on YouTube
- Mytokyokitty San’s Necklace, Spear & Costume on YouTube
- TheFirewalker’s Princess Mononoke Costume on Instructables
- Geek Grrl Crafts blog post on Making the Princess Mononoke Cosplay Accessories, Part 1 & Part 2 (I wish I’d seen hers before I did mine, I love the armband options in particular!)
If you don’t want to make your own stuff, here are some links where you can BUY these items, mostly on Etsy:

Pingback: San, Princess Mononoke | Bad Wolf Cosplay
Where did you get the earrings?
I found mine on eBay but they’re HEAVY, and they’re no longer listed by the same seller. I would try Etsy and search for “shell earrings”. I just did a quick search and found these, for example: https://www.etsy.com/listing/385263632/beautiful-round-shell-earrings-shell
awesome!